

This Chocolate Peppermint Bark Ice Cream Recipe is like Christmas in a cone. It's a no churn recipe and the easiest ice cream I have ever made. The best part is, it only requires 5 ingredients!

Peppermint ice cream 100% reminds me of the holidays. It's the only ice cream I crave in the Winter time. We used to go to Disney before Christmas almost every year and I would always hit up the Ghirardelli Ice Cream Shop and feast on their Peppermint Ice Cream.
I wanted to bring in the brand for this recipe, so we are using their peppermint bark chocolate squares. I love the combination of milk chocolate and peppermint bark, and it works fantastic in this easy, no churn ice cream recipe.
Jump to:
Why You'll Love This Recipe:
- It's so delicious & there is something really festive about peppermint during Christmas.
- This recipe is no churn, which means you don't need an ice cream machine.
- It is only a few ingredients.
- Skip the preservatives in those boxed ice creams and make your own!
If you have a lot of people in the house that don't like peppermint, try my oreo no churn recipe.
Time Needed to Make and Freeze:
It only takes 15 minutes to prep this ice cream. Then, it needs to freeze overnight in an ice cream container for the best consistency.
Ingredients:
Sweetened Condensed Milk- The ingredient that allows us to skip the ice cream machine and make this easy no churn ice cream.
Heavy Whipping Cream- Gives the ice cream a rich and creamy flavor.
Vanilla & Salt- For additional flavor.
Ghirardelli Chocolate Peppermint Bark Squares- The star of the show. These squares flavor the ice cream with a subtle peppermint flavor and make the best bite!
How to Make Chocolate Peppermint Bark Ice Cream:
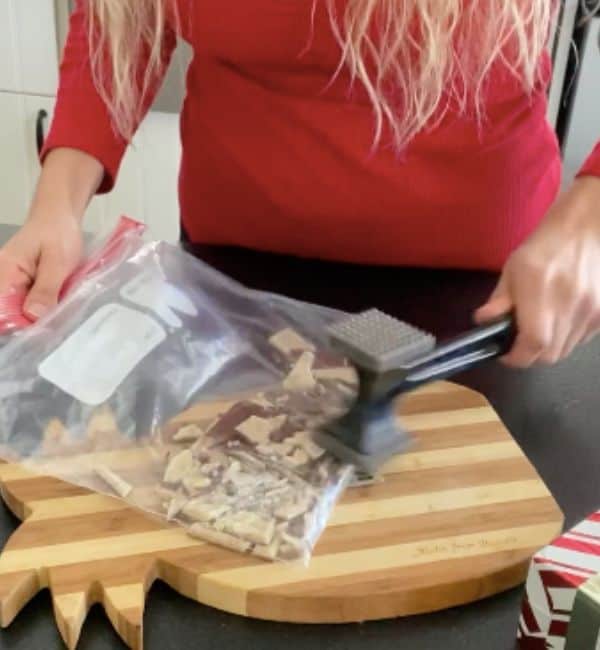
Crush up the peppermint squares into small chunks. I used a mallet to really break up the chunks. I like to have a mixture between small chunks and some that are almost like a fine sand texture (about ⅓ of the total mixture).
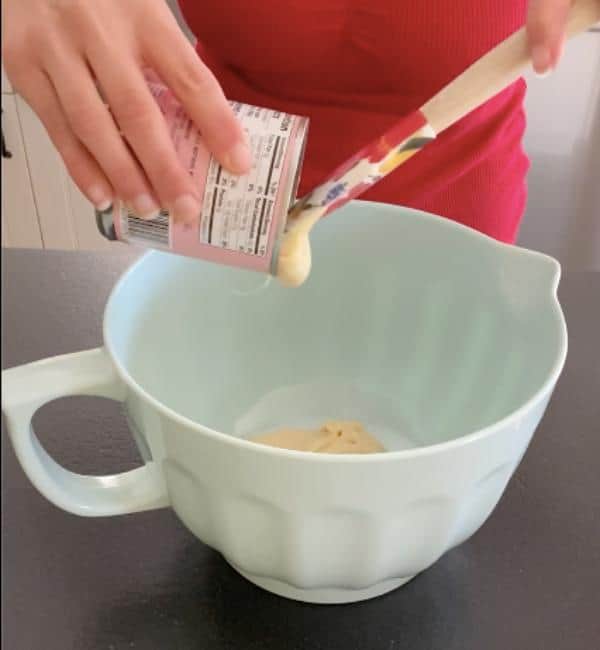
In a large bowl, mix the sweetened condensed milk, vanilla and salt. Stir & set aside.
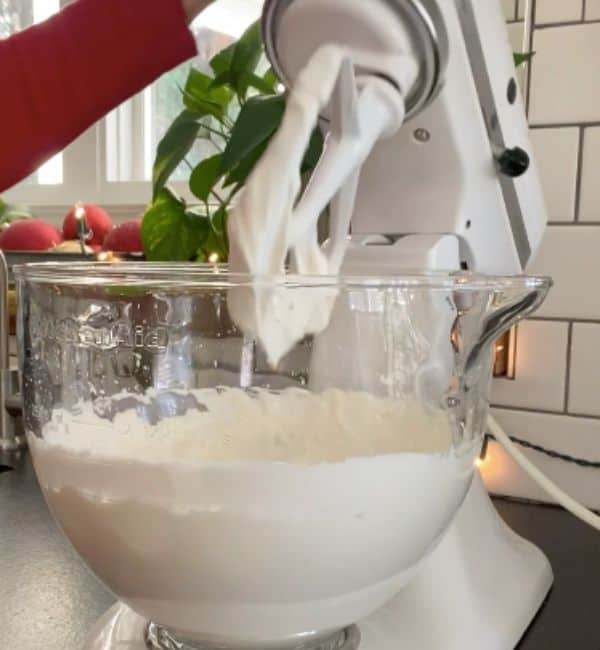
In another bowl using a hand mixer or in the stand mixer, add 2 cups of heavy cream and mix with mixer until stiff peaks form. It should look like whipped cream when you are finished. It took me about 6 to 7 minutes on medium high in my stand mixer to get the desired consistency.
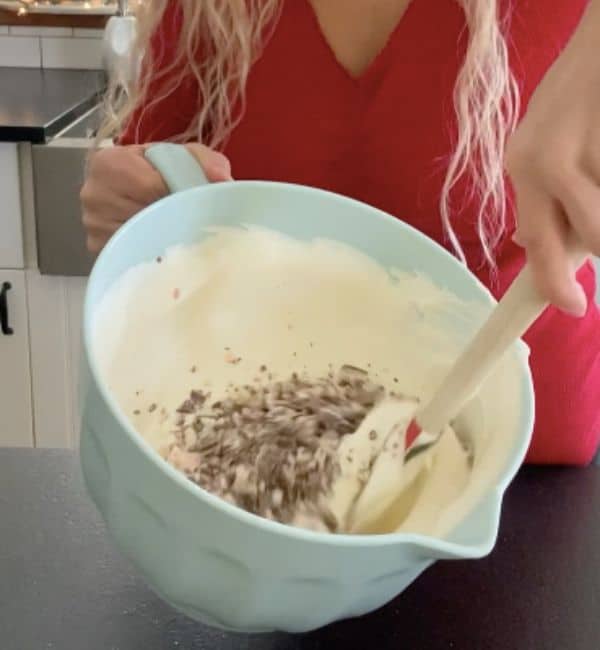
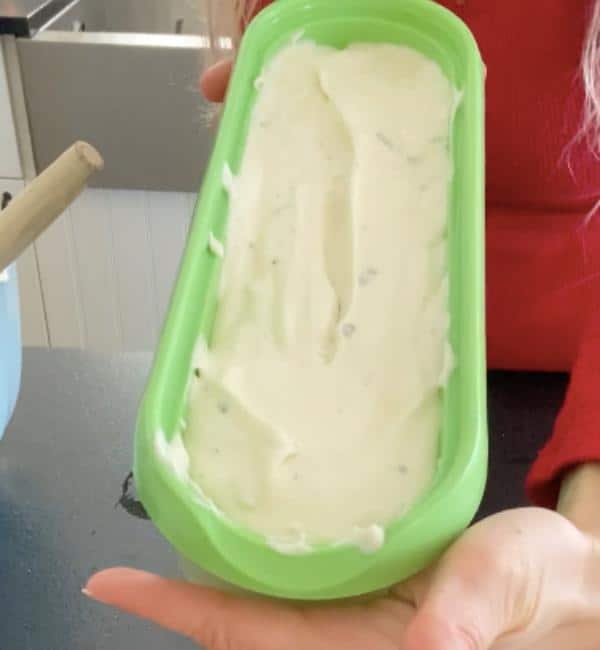
Fold your whipped cream into the sweetened condensed milk mixture. You don’t want to stir heavily here, but do fold it several times to make sure it is mixed together well. Add in the crushed peppermint and give it a nice fold to incorporate.
Pour the ice cream into the ice cream container. Put the lid on and freeze overnight.
Enjoy!
Storage:
This ice cream needs to be stored in a proper ice cream container. For the best flavor, eat within one week.
More Desserts You'll Love:
Print

Recipe
Chocolate Peppermint Bark Ice Cream
- Total Time: 12 hours, 15 minutes
- Yield: 6 servings 1x
Description
This chocolate peppermint bark ice cream is the the best no churn recipe and the easiest ice cream I have ever made. The best part is, it only requires 5 ingredients.
Ingredients
- 1 (14 oz) can of sweetened condensed milk
- 2 cups of heavy whipping cream
- 1 teaspoon vanilla
- pinch of salt
- 10-12 Ghirardelli Chocolate Peppermint Bark Squares (dark or milk chocolate), crushed into tiny pieces (the regular sized squares, not the minis)
Instructions
- Crush up the peppermint squares into small chunks. I used a mallet to really break up the chunks. I like to have a mixture between small chunks and some that are almost like a fine sand texture (about ⅓ of the mixture).
- In a large bowl, mix the sweetened condensed milk, vanilla and salt. Stir & set aside.
- In another bowl or in the stand mixer, add 2 cups of heavy cream and mix with mixer until stiff peaks form. It should look like whipped cream when you are finished. It took me about 6 to 7 minutes on medium high in my stand mixer to get the desired consistency.
- Fold your whipped cream into the sweetened condensed milk mixture. You don’t want to stir heavily here, but do fold it several times to make sure it is mixed together well. Add in the crushed peppermint and give it a nice fold to incorporate.
- Pour the ice cream into the ice cream container. Put the lid on and freeze overnight. Enjoy the next day!
Notes
I suggest freezing overnight for the best texture!
- Prep Time: 15 minutes
- Freeze Time: 12 hours
- Cook Time: 0 minutes
- Category: dessert
- Method: freeze
- Cuisine: dessert


Payton says
I ate so much of this!! YUMMMMM!!